The Billing layer should be updated once a quarter. Gina will provide a spreadsheet from the billing program. This spreadsheet is typically called something like "Trial Balance Report". (For the purposes of these instructions YYYY is the four digit year, MM is the two digit month, DD is the two digit Day).
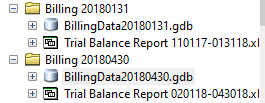
Begin by setting up a new folder in "G:\MASTER\Billing Data" folder. This folder should have the format "Billing YYYYMMDD".

Copy the "Trial Balance Report" to this new folder.

Open the Trial Balance Report in excel and delete any rows at the top leaving the field headings in place.

Copy and paste the geodatabase from the previous quarter. Rename the geodatabase with the correct date using the format "BillingDataYYYYMMDD".
Delete all of the feature classes in the geodatabase except for "ModAddresses". Rename this layer to "OLD ModAddresses". From the address layer in the previous billing cycle geodatabase select addresses by attribute that have "SOURCE = SANITARY". Export this selection to the current geodatabase and call it "ModAddresses".
Import the current Address_Points, Parcels, and Street_Centerlines into the Geodatabase. You can download the latest Address_Points and Parcel shapefiles from the \\delcounty\delco\shared\GIS folder on the network.
Append the ModAddress to the the Address Points layer.
Set data sources for the Address_Points, Parcels, and Street_Centerlines to the features you just imported. If ModAddresses or GeocodingResults exist in the map, remove those layers from the map.

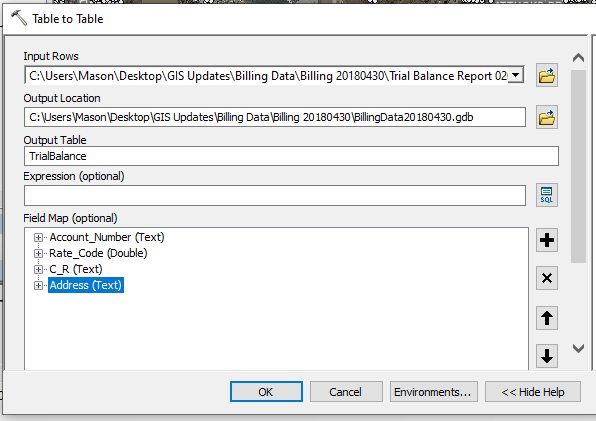
Switch the table of contents view to "show by data source" and remove the TrialBalance table from the previous quarter.
Import the Trial Balance Report as a new table in this database. Exclude all but the first four columns in the table in the field map section.
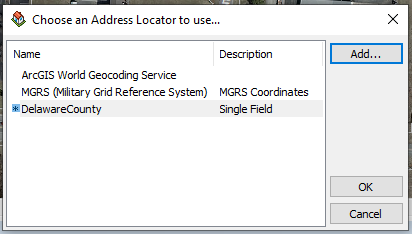
Turn on the Geocoding toolbar and click the Geocode Addresses button.

Select the Delaware County option from the list of Geocoders. If this does not show up in the list you can added it from "G:\Billing Data\AddressLocator".
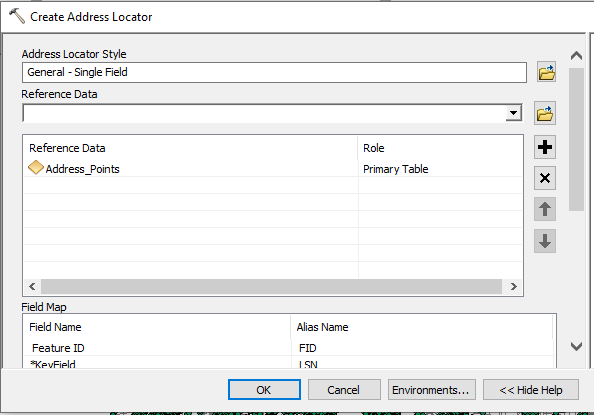
Create an address locator if one has not already been created. The style should use a single field and the key field should be LSN from the Address_Points layer. Save the locator in the Billing Data\AddressLocator folder.
Create a Fake_Addresses layer. This layer will have the same attributes as the Address_Points layer but we will only populate it with addresses that could not be found by the geocoder. Most often these will be associated with master billing accounts. The Fake_Addresses layer from the previous quarter can be used as a starting point.
Merge the Fake Addresses layer and Address_Points layer. The new layer will be called the Merged_Addresses. This is the layer we will run the geocoder on.
When reviewing tied matches eliminate any Fake_Address points first.